Getting started with SOL
Quick start guide for SOL 3D scanner
New to SOL 3D Scanner? Download the Quick start guide (more languages at bottom of page) to get up and running in no time and get some good tips on scanning - or follow the guide on this page.
Software installation
Download the SOL Software here. Run the installer and follow the instructions to install the software. When installed you can continue.
Your first scan
Your first scan should be a test scan of the duck that comes with your SOL 3D scanner. Use the near scanner position for this scan. Read about the scanner positions here.
Follow the 7 steps below and use the duck as your scanning object first time to make sure it is set up right and you are ready to scan anything you like.
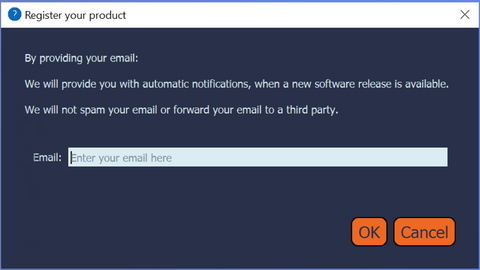
Step 1 – Register your scanner
Provide your email to register your SOL Scanner to receive new software releases and more.
Step 2 – Calibration
When the software opens, Click on the Scan button. You will then be instructed to remove everything from the turntable to calibrate the device.
Place the scanner in a stable place - vibrations can cause calibration and scan errors due to the use of high precision laser.
Calibrating will determine the distance to the turntable and prepare for the scanning process.
Click on the OK button.
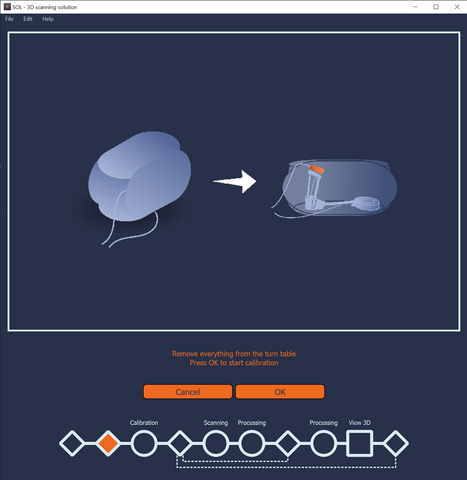
Note: Ensure the scanner is placed within the tent and the overlay is placed over the tent.
If your scanner is always in the same space you can disable the calibration before next scanning.
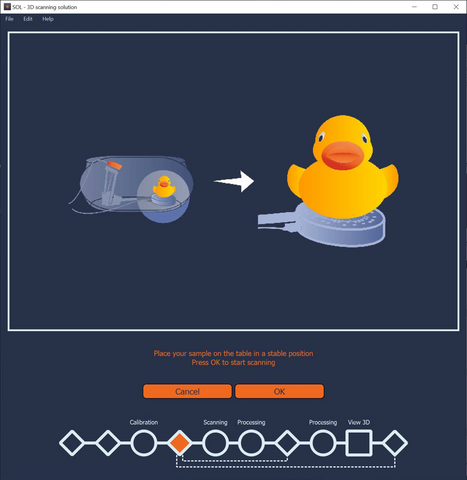
Step 3 – Place the object
Once the calibration has been completed. Place the object (use the duck for your first scan) on the turntable to scan.
Keep the scanner inside the tent and place the overlay on top when the object is in place. Start the scan.
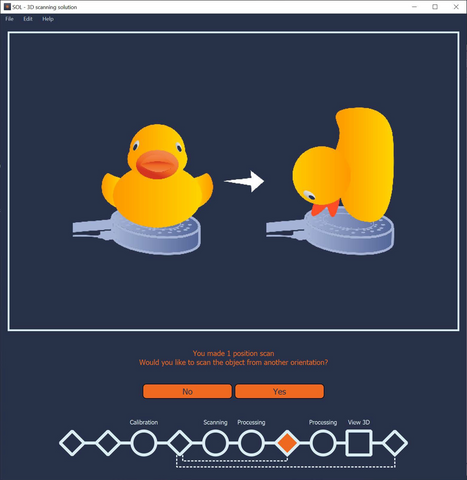
Step 4 – Change Orientation
Once the first scanning pass is completed you will be prompted to change the orientation (it is recommended with at least 2 scanning passes for best results). Place the object in a new orientation and then click on the Yes button (as instructed).
After the second scanning pass you can change orientation again or you can click the No button to finish the scan.
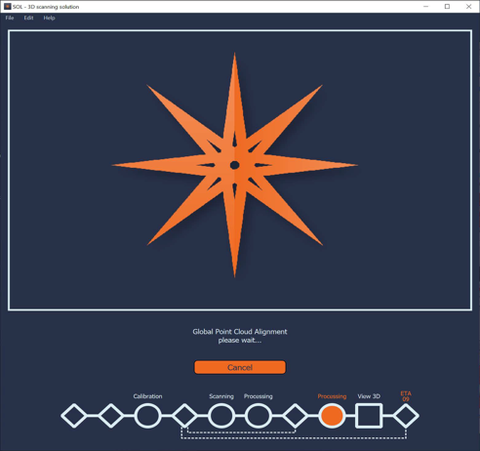
Step 5 – Combining Files - Mesh
Once all scanning passes have been completed the software will do the hard work for you and combine all the scanning passes into one 3D file.
Step 6 – SOL Viewer
Once the 3D file is ready the SOL Viewer will automatically launch. The SOL Viewer allows you to use advanced options, share, save, etc.
You can save your 3D file to the following file formats: OBJ, STL, DAE, XYZ or PLY
Step 7 – Success
You have now scanned your object and if this was your test scan you know that everything is set up correct.
The result of scanning the duck in near scanner position with one scanning pass should be similar to the 3D duck below. Continue to scroll this page for troubleshooting.
Happy scanning.
Troubleshooting
Has something gone wrong in the process here are the first steps to take:
- Make sure you have connection to the internet for the first scanning to fetch calibration data.
- Use the USB 3.0 ports on your computer or a powered USB hub to connect the scanner.
- Place the scanner within the tent and use overlay to cover the tent so no light from the room disturb the scan.
Make sure above is correct and then go back to step 2 and try again. If you still experience problems please search for answers in our knowledge base or contact our support.
SOL Quick start guide in multiple languages
SOL Quick start guide - English
SOL Quick start guide - French
SOL Quick start guide - German
SOL Quick start guide - Italian